
The life of an innovative student is filled up with both wonderful and unnerving encounters. On the other hand, students have to encounter a big problem which is how to use ANSYS Fluent. We get this, and to make it more reliable for you, we have built up our Ansys Assignment Help which gives you the best assignment related to Ansys.
But many of the students didn’t know how to use Ansys fluent software which is not a big problem but many of you think that it is like climbing a mountain.
In this blog our experts will help you to learn how to use Ansys Software which is very easy to learn for anyone. But for it you have to make interest in this field or in the software because without interest it is difficult to learn about anything. So first make your interest towards Ansys Software.
Now let’s Start learning about Ansys first Then we will guide you about How to use Ansys fluent.
What is Ansys?
Table of Contents
Definition
Ansys Stand for Analysis system
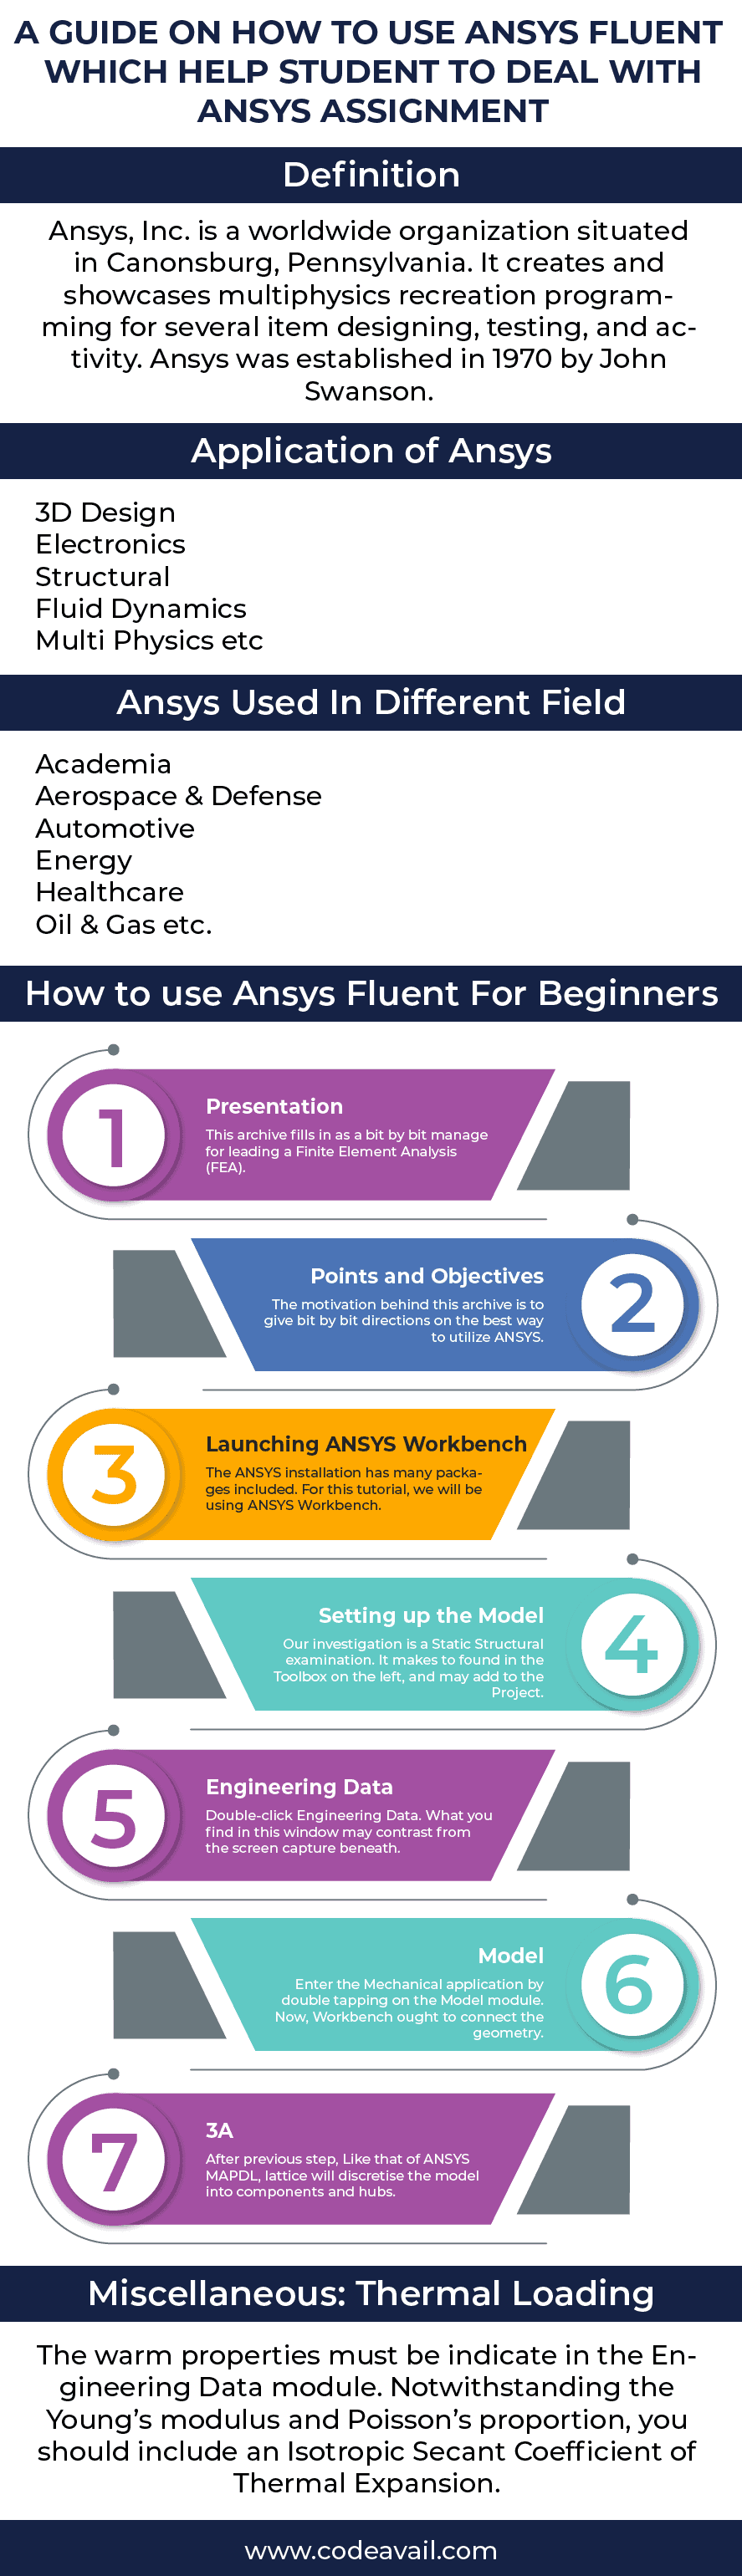
Ansys, Inc. is a worldwide organization situated in Canonsburg, Pennsylvania. It creates and showcases multiphysics recreation programming for several item designing, testing, and activity. Ansys was established in 1970 by John Swanson.
John Swanson offered his passion for the organization to investors in 1993. Ansys opened up to the world on NASDAQ in 1996, During the 2000s, It made various acquisitions of other engineering configuration organizations, getting extra innovation for liquid elements, gadgets plan, and different material science investigations. It turned into a segment of the NASDAQ-100 record on December 23, 2019.
ANSYS is a software package that lets you digitally model real world phenomena. It uses computer-based numerical techniques to solve physics problems. The range of problems ANSYS can solve is immense and could be anything from fluid flow, heat transfer, stress analysis and more.
The real power of an FEA or CFD package such as ANSYS is that it can solve problems that are not amenable to an analytical approach. That is, they don’t have standard formulae. Now, with the arrival of cheap utility computing in the form of cloud, you can really push the limits of what can be modeled on the computer.
Application of Ansys
- 3D Design
- Electronics
- Structural
- Fluid Dynamics
- Multi Physics etc
Ansys Used In Different Field
- Academia
- Aerospace & Defense
- Automotive
- Energy
- Healthcare
- Oil & Gas etc.
Now you perfectly learn about the Ansys Basics, Let’s move forward to learn about how to use Ansys fluent.
How to use Ansys Fluent For Beginners
Presentation:
This archive fills in as a bit by bit manage for leading a Finite Element Analysis (FEA) utilizing ANSYS Workbench. It will cover the utilization of the recreation bundle through the graphical UI (GUI). Further developed themes will likewise be quickly secure.
Points and Objectives:
The motivation behind this archive is to give bit by bit directions on the best way to utilize ANSYS Workbench through the GUI. Upon consummation, the understudy ought to have the option to: • use evenness conditions to disentangle an average designing issue • play out a limited component reproduction of a common building issue • explore the impacts of specific factors that are changed
Step 1: Launching ANSYS Workbench
The ANSYS installation has many packages included. For this tutorial, we will be using ANSYS Workbench.
• Start menu > ANSYS 15.0 > Workbench 15.0
Step 2: Setting up the Model (Pre-Process)
Our investigation is a Static Structural examination. It makes to found in the Toolbox on the left, and may add to the Project Schematic by either double tapping it, or hauling it into the sheet.
The Static Structural segment and the entirety of its modules will be made. The modules are like those in ANSYS MAPDL. They diagram the means that are required to finish a limited component examination.
•Engineering Data module is utilized to characterize the material properties.
• Geometry module opens the Design Modeler application, which can be utilized to import CAD models from other programming like Solid Works or to portray another 2D or 3D geometry.
. • Model, Setup, Solution, and Results modules opens the Mechanical application, which can be utilized to set up and understand the reenactment (incorporates lattice, burden and limit condition applications, settling, and results).
Step 2A: Engineering Data
Double-click Engineering Data. What you find in this window may contrast from the screen capture beneath. In here, you can include another material by characterizing another material section for Mild Steel. We need to characterize the material as an isotropic flexible one.
Two yellow boxes will show up in the Properties sheet. In ANSYS Workbench, yellow boxes show esteems that must be enter before proceeding. For this situation, enter in the Young’s Modulus (in Pa) and Poisson’s Ratio for Mild Steel (discover values for these yourself in course readings or in articles). Mechanics of Solids 2 4 Exit Engineering Data by shutting the tab at the highest point of the window and coming back to the principle Project.
Step 3: Model
Enter the Mechanical application by double tapping on the Model module. Now, Workbench ought to connect the geometry that made in Design Modeler and make it accessible. In the Mechanical application, where we will finish the arrangement of this reenactment and settle it.
Now, notice that the Mechanical application has two sheets on the left: “Blueprint” and “Subtleties”. The Outline sheet contains a tree with all the settings you add to the model. The Details sheet will give alternatives to every one of these settings that you can change.
As a result, In the wake of designing Workbench to run this Static Structural reenactment in 2D, the Mechanical application takes into consideration the utilization of different 2D suspicions, including the plane pressure and plane strain presumptions. For plane pressure, a thickness should be characterize, as it expect to compute the strain in the z heading.
| • “Outline” pane > Model > Geometry • “Details” pane > Definition > 2D Behavior > “Plane Stress” • “Outline” pane > Model > Geometry > Surface Body • “Details” pane > Definition > Thickness > Type “0.1” |
You may also specify a material for each geometrical body in your simulation.
| • “Outline” pane > Model > Geometry > Surface Body • “Details” pane > Material > Assignment > “Mild Steel” |
Step 3A:
After previous step, Like that of ANSYS MAPDL, lattice will discretise the model into components and hubs that will look like the geometry. The game plan of these components and hubs is as a work. As a result, you may have made sense of from Assignment 1, the work can affect the consequences of the examination. A better work normally gives increasingly precise outcomes, yet at the expense of higher computational prerequisites. Other work factors, for example, shape, component request and dissemination, may likewise impact the precision of your outcomes.
As a result, In this model, we will set all the components to be triangles, as this will fit in with the geometry. The measuring will be set to 0.1m in this instructional exercise, anyway this is sufficient little to make your recreation sufficiently precise. You should change this number yourself to assess the impact of component size on your outcomes.
Miscellaneous: Thermal Loading
A warm burden may be add to the model from inside Static Structural.
The warm properties must be indicate in the Engineering Data module. Notwithstanding the Young’s modulus and Poisson’s proportion, you should include an Isotropic Secant Coefficient of Thermal Expansion. This requires both a development coefficient and a reference temperature. Enter this in yourself. In the wake of leaving the Engineering Data module, make sure to refresh your task.
Back in the Mechanical application, we should characterize the earth temperature and the warm condition. Set the earth temperature to the reference temperature. The warm condition will rely upon the reference temperature.
For instance, if your reference temperature is 25 degrees, and your temperature increments by 25 degrees, your size ought to be 50 degrees.
Note that what has been portray here won’t be sufficient for you to finish the inquiry in the task. You should include the suitable limit conditions
Conclusion:
In this blog, you will probably learn about how to use Ansys Fluent and what is Ansys. Our experts will guide you about this software but you have to work or do practice on it after that only you can be perfect in this software for more learning about this you can use our Ansys Assignment For Students. You can contact our experts anytime if you have any queries related to this topic they will help you in the best way.
Comments are closed.